A pipe leak rarely shows up at a convenient moment. A repair clamp stops it in minutes without shutting supply down completely, but it is worth understanding what it genuinely solves and when it is just a patch that will fail.
What is a repair clamp?
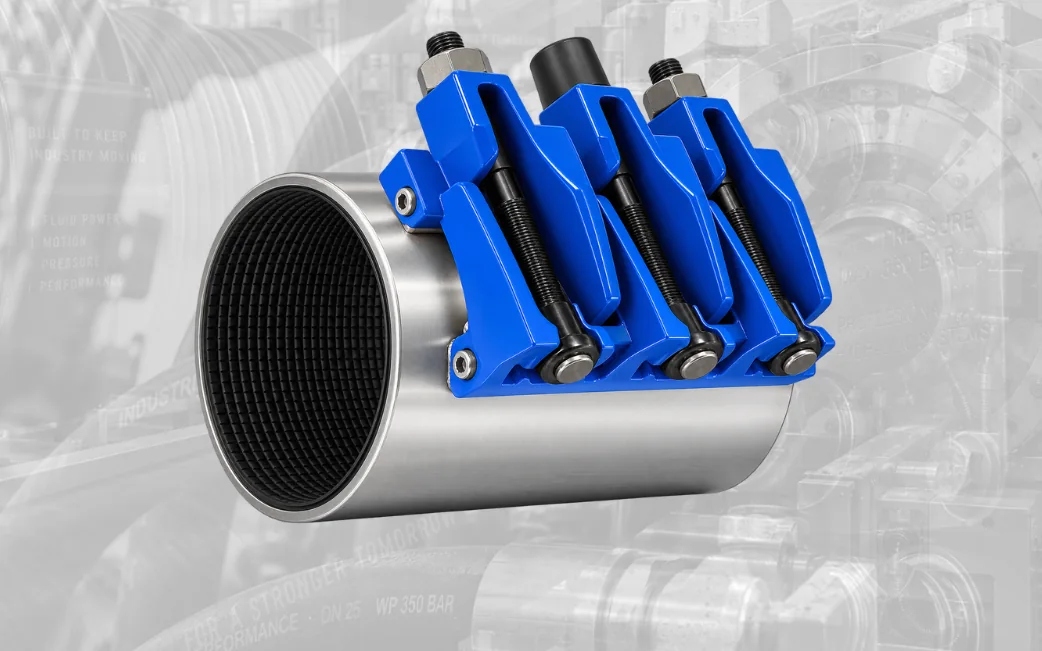
It is a metal band —usually stainless steel— with a rubber gasket on its inner face. It wraps around the pipe over the leak, and as the bolts are tightened the rubber compresses against the wall and seals the hole.
It works because the clamping pressure exceeds the internal fluid pressure at that point. It does not repair the damaged material: it covers it from the outside.
When does it work well?
- Localised perforations from corrosion or an impact.
- Short longitudinal cracks, provided the band covers them completely with margin.
- Joint leaks where the pipe is sound but the connection weeps.
- Emergency repairs that keep the operation running until the scheduled shutdown.
On moderate-pressure water pipe with sound wall around the damage, a properly fitted clamp can last for years.
When should it NOT be used?
This is the part that prevents accidents:
- On hydraulic hoses. Never. If the steel reinforcement is damaged, the hose gets replaced. A clamp over broken reinforcement is a failure waiting to happen, and at those pressures it is dangerous.
- When the pipe is corroded throughout the area. If the surrounding wall is also thin, the clamp seals one point and the leak reappears two centimetres away.
- On long cracks the band does not cover with enough margin.
- On gas or hazardous chemical lines, where the repair must be permanent and certified.
- Over a deformed section: if the pipe lost its round shape, the gasket will not seat evenly and it will keep weeping.
How is it installed correctly?
The procedure matters more than the clamp.
Depressurise the line whenever possible. Installing under pressure is feasible on minor leaks, but it is harder to get a good seat and there is a jet risk.
Clean the surface. Loose rust, flaking paint or sediment stop the gasket from sealing. A quick wire-brushing completely changes the outcome.
Centre the band over the leak, leaving margin on both sides. If the damage sits at the edge of the gasket, it will seep.
Tighten crosswise and progressively, alternating between bolts the way you tighten a car wheel. Fully tightening one before the other misaligns the band and leaves one side without pressure.
Check after 24 hours. Gaskets bed in; a gentle re-torque the next day is normal and necessary.
Which material should I choose?
For the band, stainless steel is advisable in practically any Panamanian installation: humidity and proximity to the sea punish plain steel, and a rusted clamp loses tension exactly when it is needed most. See options under stainless steel banding and the rest of the accessories under valves and equipment.
For the gasket, the material must be compatible with the fluid. Common rubber works for water; an aggressive chemical or a hydrocarbon may require a different compound.
Temporary or permanent repair?
It depends on why the pipe failed. If it was a one-off impact on sound pipe, the clamp can be the final solution. If it was corrosion, the clamp buys time: the same process that perforated that point is still acting on the rest of the run.
The useful question is not whether it holds, but why it failed. If the answer is general corrosion, schedule replacement of the section even though the leak has already stopped.
Send us a photo of the leak on WhatsApp, with the pipe diameter and the fluid, and we will confirm the right size and whether the case takes a clamp or calls for replacement.